To save time while scanning old prints, organize your collection by date, subject, or system before starting. Use a high-quality flatbed scanner with at least 600 dpi, and set consistent, lossless formats like TIFF for best results. Review and crop images immediately after scanning, then rename and store files systematically with metadata. Backup your digital files regularly to prevent loss. Follow these steps, and you’ll discover how a streamlined workflow makes preserving memories quick and efficient.
Key Takeaways
- Organize prints by date or subject before scanning to streamline the workflow.
- Use high-quality, archival scanners at 600 dpi or higher for efficient, consistent results.
- Batch process scans with uniform settings to save time and ensure quality consistency.
- Automate file naming and metadata entry to facilitate quick organization and retrieval.
- Regularly back up digital files to prevent data loss and maintain long-term access.

Scanning old prints is a practical way to preserve your cherished memories and guarantee they last for generations. When you take the time to scan your photographs, you’re not just creating digital copies; you’re assuring these moments are protected through effective digital preservation. To get the best results, focus on using high-quality scanners that support archival quality, which means capturing every detail, color, and nuance of your original prints. This approach assures that your digital files remain faithful to the originals and stand the test of time.
Scanning old prints preserves memories and ensures lasting, faithful digital copies for future generations.
Your workflow should start with gathering all your prints and organizing them based on date, subject, or any system that makes sense for you. Before you begin scanning, clean the prints gently to remove dust and fingerprints, which can interfere with image quality. Next, select a scanner with the resolution capabilities suited for archival quality images—at least 600 dpi is recommended for photographs. This detail level guarantees sharpness and clarity when viewing or printing the images later. It’s worth investing in a flatbed scanner with a transparency unit if you’re working with fragile or delicate prints, as this helps prevent damage during the process. Additionally, choosing a scanner that supports archival quality ensures your digital copies will last for decades without significant degradation. Incorporating digital preservation techniques during your scanning process further safeguards your memories from future risks. Using consistent settings can also help prevent variations that might compromise the overall quality of your digital archive.
As you scan, keep your settings consistent to assure uniformity across your collection. Opt for lossless file formats like TIFF when saving your scans to maintain maximum quality and prevent compression artifacts. These formats are ideal for digital preservation because they hold all the data from your original print, making future edits or reproductions more accurate. After scanning, take a moment to review each image, cropping out any borders or imperfections to streamline your digital archive. Renaming files systematically—by date or subject—makes it easier to locate specific memories later on. Implementing file organization strategies early on can save significant time during future searches and reviews.
Once your scans are complete, back up your digital files in multiple locations, such as an external hard drive and a cloud storage service, to safeguard against hardware failure or accidental deletion. Consider creating a digital catalog or database that includes metadata like dates, names, and locations to add context to each photo. This step boosts your overall digital preservation efforts and makes future retrieval faster and more efficient. Regularly updating and maintaining your digital archive ensures all your precious memories stay accessible and protected over time.

Epson Perfection V19 II Color Photo and Document Flatbed Scanner with 4800 dpi Optical Resolution, USB Power and High-Rise, Removable Lid
Amazing image clarity and detail — 4800 dpi optical resolution (1), ideal for photo enlargements
As an affiliate, we earn on qualifying purchases.
As an affiliate, we earn on qualifying purchases.
Frequently Asked Questions
What Equipment Is Best for High-Quality Photo Scanning?
For high-quality photo scanning, you’ll want a scanner with a high resolution, ideally at least 600 dpi, to capture fine details. Make sure it offers color calibration options to maintain accurate colors. Flatbed scanners are typically best for delicate or detailed prints, providing sharp images and color fidelity. Look for models with adjustable settings, easy connectivity, and reliable performance, so you can efficiently produce professional-quality digital copies of your old prints.
How Do I Restore Damaged or Faded Old Prints?
Think of your old prints like ancient scrolls needing preservation. First, assess the damage carefully to understand what’s at stake. Use restoration techniques like gentle cleaning, digital repair, and color correction to bring back their original charm. You might also consider professional help for severe damage. By combining damage assessment with delicate restoration, you’ll breathe new life into your treasured memories, making them vibrant once again.
What File Formats Should I Use for Archiving?
You should archive your scanned images in lossless formats like TIFF for high quality and future editing, especially after color correction. JPEGs are suitable for sharing but aren’t ideal for long-term storage due to compression. Manage metadata carefully by embedding details about the photo’s history, date, and condition. This guarantees easy retrieval and preserves important context, making your archive organized and accessible for years to come.
How Can I Efficiently Organize Scanned Images?
You can efficiently organize scanned images by implementing good metadata management, such as tagging and descriptive filenames, which makes searching easier later. Use consistent naming conventions and folder structures to categorize by date, event, or subject. Store your images in reliable storage solutions like external drives, cloud services, or network-attached storage (NAS). Regularly back up your files and update metadata to keep your digital collection organized and accessible.
What Safety Precautions Are Needed During Scanning?
You should handle delicate surfaces carefully, using gentle techniques to prevent damage during scanning. Always unplug the scanner before cleaning or when not in use to avoid electrical hazards. Keep your workspace dry and free of clutter, and use gloves if necessary to protect fragile prints. Regularly inspect cords for damage, and make certain the scanner is grounded properly. These precautions keep both your prints safe and your environment secure.

FastFoto FF-680W Wireless High-Speed Photo Scanner for Old Pictures to Digital Fast, Batch Photo Scanner with Feeder, Duplex Document Scanner with OCR, 600 DPI
World's Fastest Photo Scanner: Scan old pictures to digital at 1 photo per second, 600 dpi quality, Process…
As an affiliate, we earn on qualifying purchases.
As an affiliate, we earn on qualifying purchases.
Conclusion
Now that you’ve mastered this workflow, your cherished old prints will transform from dusty memories into vibrant stories. Like a skilled artist painting with light, you’ve turned a simple scan into a portal of nostalgia, preserving moments for generations to come. With each click, you’re weaving threads of history into a digital tapestry, ensuring these precious images shine bright in the tapestry of your life. Keep scanning, and let your memories dance forever in pixels.
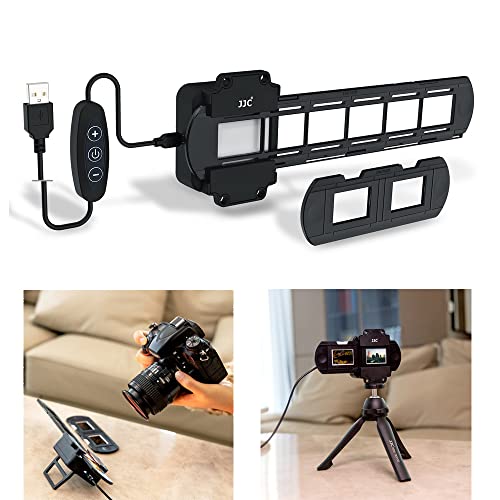
JJC Photo Slide and Film Digitizing LED Light Kit with 35mm Film Strips and Slides Holder, 10-Levels Brightness Shoe Mount LED Backlight for Photo Negatives Scanning Copying
The Negative Converter Light set is unique design for re-photographing 35mm negatives and slides with macro lenses. It…
As an affiliate, we earn on qualifying purchases.
As an affiliate, we earn on qualifying purchases.

Plustek Photo Scanner ePhoto Z300, Scans 4×6 inch Photos in 2 Seconds, Auto crop and deskew with CCD Sensor, Supports Mac and PC
The easiest way to scan photos and documents. Supports 3×5, 4×6, 5×7, and 8×10 in sizes photo scanning…
As an affiliate, we earn on qualifying purchases.
As an affiliate, we earn on qualifying purchases.