
To prevent crooked frames on your gallery wall, start by creating paper templates that match each frame’s size. Tape these templates onto the wall to experiment with layout and spacing, ensuring everything looks balanced and aligned before hanging. Use a level to keep templates straight and mark precise nail spots. This simple trick helps you achieve a cohesive, professional look, and if you keep exploring, you’ll discover more tips to perfect your display.
Key Takeaways
- Use paper templates matching frame sizes to plan layout before hanging artwork.
- Tape templates to the wall to visualize spacing and alignment without damaging surfaces.
- Adjust templates easily to perfect spacing and positioning prior to installing frames.
- Mark nail or hook spots directly on the wall using templates as guides for accuracy.
- Maintain consistent alignment and spacing with level and measuring tools for a cohesive gallery wall.
Creating a gallery wall can transform any space, but successful planning is key to achieving a cohesive and stylish display. One of the most common challenges is guaranteeing that your frames are perfectly aligned and evenly spaced. Without careful preparation, your wall can look cluttered or uneven, which distracts from the overall aesthetic. That’s where the paper-template trick comes in—an easy, effective method to keep your layout on point before you start hammering nails into the wall.
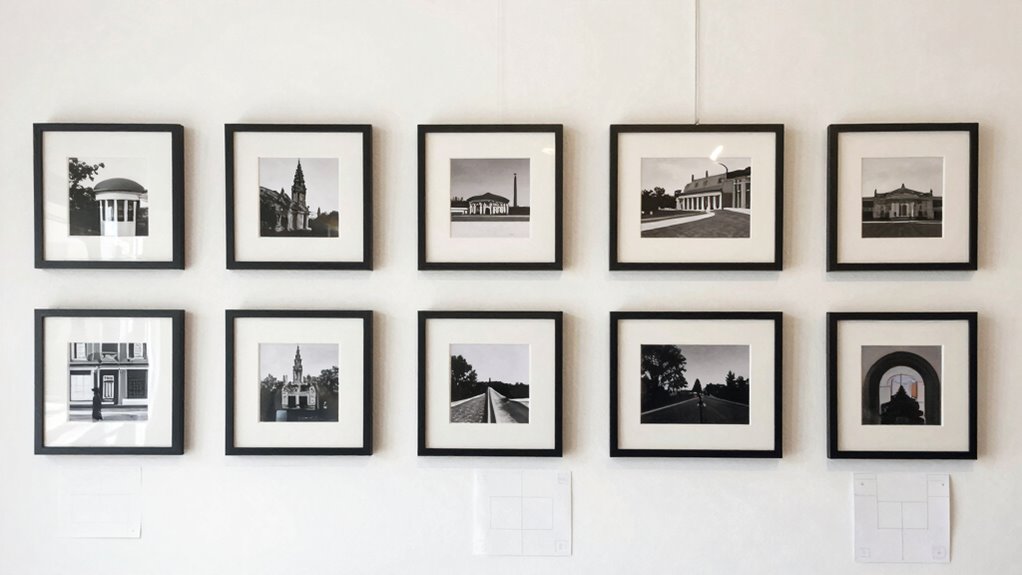
Start by choosing your frames and artwork. Once you’ve decided on the pieces you want to display, cut pieces of craft paper or newspaper to match their dimensions. These templates serve as stand-ins for your actual frames. Tape the paper templates onto the wall, experimenting with different arrangements and spacing. This step allows you to visualize the final look and make adjustments without damaging your wall or having to move frames repeatedly.
Choose your frames and art, then create paper templates to plan your perfect gallery layout.
When placing these paper templates, pay close attention to frame alignment. Make sure the tops, bottoms, or centers line up as you desire. Consistent alignment creates a unified, polished look. Use a level to check that each template is straight—this small step assures your gallery wall doesn’t look crooked once the real frames are hung. As you position each paper, keep an eye on spacing consistency, maintaining equal gaps between neighboring templates. Using a ruler or measuring tape can help you confirm that the distances are equal, which is vital for a balanced appearance.
Once you’re happy with the arrangement, mark the wall lightly with a pencil where the nails or hooks will go. Use the paper templates as a guide to mark the exact spots, making certain that your actual frames will match the plan perfectly. This method prevents the common mistake of uneven spacing or crooked frames, saving you time and frustration later.
When hanging your frames, follow the same alignment and spacing principles you established with the paper templates. Double-check that each frame is level and that the spacing feels consistent across the entire display. If you notice any discrepancies, adjust accordingly before securing the frames completely. This attention to detail makes a significant difference in the visual harmony of your gallery wall.
In the end, taking the time to plan with paper templates guarantees your gallery wall will look professional and intentional. By focusing on frame alignment and spacing consistency during the setup, you create a cohesive, stylish display that elevates your space and reflects your personal style. Incorporating visual planning techniques can further enhance your ability to visualize and execute your perfect gallery wall.
As an affiliate, we earn on qualifying purchases.
Frequently Asked Questions
What Tools Are Best for Hanging Gallery Frames Accurately?
To hang gallery frames accurately, you should use a measuring tape to mark the spots, a level to make sure everything’s straight, and picture hooks or wall anchors suited to your wall type. The measuring tape helps with precise placement, while the level keeps your frames perfectly aligned. Wall anchors provide extra support for heavier frames, preventing slips or crooked hangs. Combining these tools makes your gallery wall look polished and professional.
How Do I Choose the Right Frame Sizes for My Wall?
You should start with wall space measurement to determine the overall area you want to fill. Then, consider frame size selection by choosing sizes that complement each other and fit comfortably within your space. Mix different frame sizes for visual interest, but keep balance in mind. It’s all about creating harmony—measure carefully, select sizes thoughtfully, and you’ll craft a gallery wall that feels just right.
Can This Paper-Template Method Be Used on Textured Walls?
Yes, you can use the paper-template method on textured walls, but you’ll need to make some template modifications. Textured surfaces may prevent the paper from sticking flat, so use painter’s tape or putty to secure the templates securely. Press firmly to prevent slipping, and consider using lightweight paper. This way, you can accurately plan your gallery wall without worrying about crooked frames, even on textured walls.
How Do I Update or Change Frames Without Redoing the Template?
Updating your gallery wall is like re-tuning a musical instrument—you want everything to harmonize perfectly. To do a frame replacement or template adjustment, carefully remove the old frame, then reposition the paper template. If you need to change the frame, adjust the template’s placement if necessary, and re-hang. This way, you keep your layout intact while seamlessly updating your frames without redoing the entire template.
What Are Tips for Balancing Asymmetrical Gallery Arrangements?
To balance an asymmetrical gallery, start by establishing a clear focal point, like a large or striking piece. Use visual balance by distributing smaller frames evenly around it, avoiding clutter. Mix frame sizes and orientations for interest, but keep the overall composition cohesive. Step back frequently to assess, ensuring your arrangement feels balanced and intentional. Adjust spacing as needed to create harmony, making sure no side feels heavier than the other.
Conclusion
By using the paper-template trick, you transform your gallery wall from a chaotic mess into a masterpiece—like Da Vinci preparing his canvas. This simple method keeps your frames perfectly aligned and your wall looking polished. So, next time you’re ready to hang, remember that a little planning now guarantees your wall will be a work of art. With patience and precision, you’ll create a display that’s as inspiring as a gallery’s finest collection.