
This guide walks you through decorating a space for an adult or family Halloween party, start to finish. You will end up with a coordinated spooky atmosphere: themed entryway, decorated main party area, ambient lighting, a photo backdrop, and a decorated food table. No crafting expertise is required — every project here uses store-bought or simple DIY materials and basic tools.

Get the little things that make your day delivered free with Prime
- Fast, free delivery on millions of items
- Prime Video, Amazon Music and more included
- Member-only deals all year
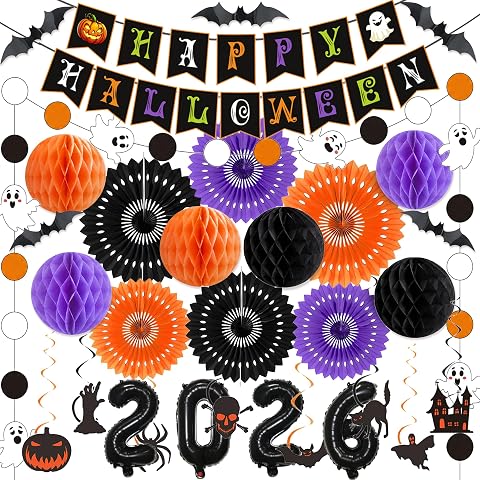
Ainiel 39-Piece Halloween Party Decoration Set with 2026 Foil Balloons
- ✔ Brand: Ainiel
- ✔ Piece count: 39
- ✔ Theme: Halloween 2026

HOPULARITY Happy Halloween Party Decorations Set – 22pcs Paper Lanterns, Pom Poms, and Banners
- ✔ Brand: HOPULARITY
- ✔ Material: Paper
- ✔ Color: Pink, Purple, Black

122-Piece Pumpkin Halloween Party Tableware Set for 24
- ✔ Brand: YRYHJD
- ✔ Piece count: 122
- ✔ Serves: 24 guests
This guide is for hosts who want a decorated space that looks deliberate and impressive without hiring anyone or spending a full weekend on it. Difficulty is beginner; the work is mostly planning, taping, hanging, and arranging. Expect 3-5 hours of hands-on setup, ideally split into a shopping/planning session and one decorating session the day before or the morning of the party.
Difficulty: Beginner | Time: 3-5 hours (plus 1-2 hours of planning and shopping)
What You’ll Need
Tools & Materials:
- Scissors and a utility knife
- Painter’s tape and clear packing tape
- Push pins or thumbtacks (check wall permissions first)
- Fishing line or command hooks for hanging items
- Extension cords and a power strip
- Step stool or ladder
- Trash bags and a vacuum for cleanup
- Measuring tape
Knowledge:
- Basic knowledge of your venue’s rules on wall attachments (especially rentals)
- Location of electrical outlets in the party space
- Rough guest count and party layout (where food, drinks, and seating will go)
Shop 1-3 days before the party so stores still have stock — popular items sell out the week of Halloween. Make one master shopping list organized by zone (entryway, main room, food table, bathroom, photo backdrop) so you buy what you actually need instead of grabbing random items. Budget roughly $50-$150 depending on space size and whether you reuse items you already own, such as white Christmas lights, black tablecloths, or candles.
Ainiel 39-Piece Halloween Party Decoration Set with 2026 Foil Balloons
This is the set we’d point most hosts toward first, because it solves the broadest decoration problem in one purchase. With a banner, paper fans, honeycomb balls, hanging swirls, and four large ‘2026’ foil balloons, it covers walls, ceilings, and a photo corner simultaneously — something the HOPULARITY set only partially manages with its 22 pieces. The date-specific balloons are the standout differentiator: they anchor the party firmly in 2026 and give guests an obvious photo backdrop, which the other two sets simply don’t offer.Compared with the HOPULARITY kit, the Ainiel set demands less DIY skill — the fans and honeycomb pieces unfold rather than requiring the fussy fluffing that tissue pom poms demand. The tradeoff is that assembly isn’t fully tool-free: you’ll want your own tape, string, or paperclips on hand, and the listing is vague about individual item sizes, so measure your wall space conservatively before committing to a layout. The classic black, orange, and purple palette is safe but less distinctive than HOPULARITY’s pink-forward scheme, so hosts wanting a trendier look may prefer that alternative. For everyone else — classrooms, office parties, home gatherings — this kit makes the most sense as the single purchase that gets a room party-ready.
Pros:
- Covers walls, ceilings, and photo areas in a single 39-piece kit
- Unique ‘2026’ foil balloons create an instant photo backdrop
- Requires no prior DIY experience to assemble
- Made from durable, reusable materials for future parties
Cons:
- You’ll need to supply your own tape, string, or paperclips
- Individual item dimensions aren’t clearly specified
- Traditional color scheme won’t suit hosts wanting a distinctive look
Best for: Hosts who want maximum decoration coverage from one purchase, especially for 2026-themed parties, classrooms, or group events
Not ideal for: Buyers who need precise sizing information for tight spaces, or anyone wanting a non-traditional color palette
Bottom line: The most complete all-around decoration kit of the three, with 2026-specific balloons that make it the easiest way to dress a whole room.
“The most complete all-around decoration kit of the three, with 2026-specific balloons that make it the easiest way to dress a whole room.”
HOPULARITY Happy Halloween Party Decorations Set – 22pcs Paper Lanterns, Pom Poms, and Banners
Where the Ainiel set plays it safe with classic Halloween colors, HOPULARITY goes the opposite direction: a pink, purple, and black palette that reads more modern party than haunted house. This pick makes the most sense for hosts throwing a Halloween-themed birthday, a teens’ party, or any event where spooky-cute beats spooky-scary. The 22 pieces — lanterns, tassels, honeycomb balls, a banner, and a dots garland — layer nicely into a photo booth backdrop or a statement wall.The honest tradeoff is effort versus quantity. Six tissue pom poms need to be fluffed and shaped by hand, which is genuinely time-consuming compared to the unfold-and-hang pieces in the Ainiel kit — though assembling them with family can be part of the fun. Coverage is also lighter: only three paper lanterns are included, so a large room will need supplemental decorations. On the plus side, the materials are sturdy enough to repack and reuse, which the disposable tableware set can’t claim. If your aesthetic leans pastel and you don’t mind an hour of crafting, this set delivers a look the other options can’t match.
Pros:
- Distinctive pink, purple, and black palette that stands out from standard Halloween decor
- Works as a birthday or Halloween backdrop thanks to the versatile design
- Fun DIY assembly that can involve the whole family
- Durable enough to be packed away and reused
Cons:
- Tissue pom poms require significant hand-fluffing time
- Only three lanterns included — larger spaces will need extra pieces
- Fewer total pieces than the Ainiel kit for similar decoration purposes
Best for: Style-conscious hosts, Halloween-birthday hybrid parties, and anyone wanting a softer pink-purple palette
Not ideal for: Large venues needing full coverage, or buyers who want zero assembly work
Bottom line: The style pick of the lineup — fewer pieces and more assembly effort, but a pastel look no other set here offers.
“The style pick of the lineup — fewer pieces and more assembly effort, but a pastel look no other set here offers.”
122-Piece Pumpkin Halloween Party Tableware Set for 24
This is the only pick in our lineup that isn’t a wall-and-ceiling decoration kit at all — and that’s exactly why it earns a spot. The other two sets make a room look like a party; this one makes it function as one. With 122 pieces serving 24 guests, you get dinner plates, dessert plates, napkins, cups, forks, and two tablecloths in a coordinated orange-and-black pumpkin design. For a classroom party, neighborhood bash, or any event where food is the centerpiece, this is the more practical buy than any banner kit.The coordinated design is the quiet strength here: matching plates, cups, and tablecloths give the serving table a pulled-together look that piecemeal supplies never achieve. The tradeoffs are real, though. It’s single-use tableware, so unlike the reusable HOPULARITY and Ainiel kits, everything goes in the trash at the end of the night — a fair concern for eco-minded hosts. It also does nothing for walls, ceilings, or ambiance, so most parties will pair it with at least a small decoration set. Think of it as the complement to the Ainiel kit rather than a competitor: one covers the room, the other covers the table.
Pros:
- Complete coordinated tableware for 24 guests in one purchase
- Matching pumpkin design across plates, cups, napkins, and tablecloths
- Disposable pieces eliminate post-party dishwashing
- Two tablecloths cover both a food table and a dining table
Cons:
- Single-use design creates waste and offers no reuse value
- Doesn’t decorate walls, ceilings, or photo areas
- Less versatile than the decoration kits for non-food events
Best for: Hosts serving a meal or treats to a large group — classroom parties, community events, big family gatherings
Not ideal for: Eco-conscious buyers avoiding disposables, or anyone who needs wall and ceiling decorations
Bottom line: Not a decoration kit in the traditional sense, but the smartest single purchase for any Halloween party where feeding 24 people is the priority.
“Not a decoration kit in the traditional sense, but the smartest single purchase for any Halloween party where feeding 24 people is the priority.”
As an Amazon Associate we earn from qualifying purchases.
Before You Start
Do these three things before decorating anything:
- Clear and clean the space. Remove everyday clutter, valuables, and breakables from the party area. Decorations look worse on top of mess, and guests with drinks will knock things over.
- Decide your zones. Walk the space and assign areas: entryway (first impression), main room (where guests gather), food table, photo backdrop, and bathroom. If you decorate every surface evenly, nothing stands out. Concentrate effort on the entryway and photo backdrop, since those get the most attention.
- Pick one theme or color scheme. Examples: classic orange and black, elegant gothic (black, deep purple, gold, candles), haunted forest (greens, moss, twigs), or spooky-cute for kids’ parties. A single scheme makes budget decorations look intentional.
Safety note: Keep all decorations away from candle flames, heaters, and stovetops. Use flameless LED candles anywhere guests or costumes could brush against them, and never block exits, walkways, or stairs with props or cords.
Step-by-Step Instructions
Step 1: Set the scene at the entryway first
Decorate the front door and entry area before anything else, because it creates the first impression and sets expectations. Hang a wreath, door banner, or cobweb spread with painter’s tape or an over-the-door hook. Line the walkway with 4-6 staked props such as small tombstones, glowing eyes, or paper luminaries weighted with sand. If guests enter through a hallway, stretch a cotton cobweb across the corners and drape a skeleton or ghost from the ceiling with fishing line at least 7 feet up so nobody walks into it.
Tip: Illuminate the entryway even if the party is indoors. A single colored floodlight or string of lights at the door signals ‘party here’ and helps guests find the house.
Check: Standing at the street or hallway entrance, you can immediately tell a themed party is happening inside, and the path to the door is clearly lit with nothing blocking it.
Step 2: Transform the lighting in the main room
Turn off overhead lights and replace the party’s mood with layered lighting. String warm white or orange lights along the ceiling perimeter, draped over curtain rods, or wrapped around banisters, securing them with command hooks every 3-4 feet so they don’t sag. Place 5-10 flameless candles on mantels, shelves, and tables at varying heights. Swap one or two lamps to purple or red bulbs for a wash of eerie color. Keep one fully lit area near the food and drink station so guests can see what they’re eating.
Tip: Dim does not mean dark. Aim for spaces guests can move through safely while still feeling atmospheric. Test the lighting at the same time of day as your party.
Check: With overhead lights off, the room glows from multiple low light sources, has no pitch-black walking paths, and the food area is clearly visible.
Step 3: Hang ceiling and wall decorations
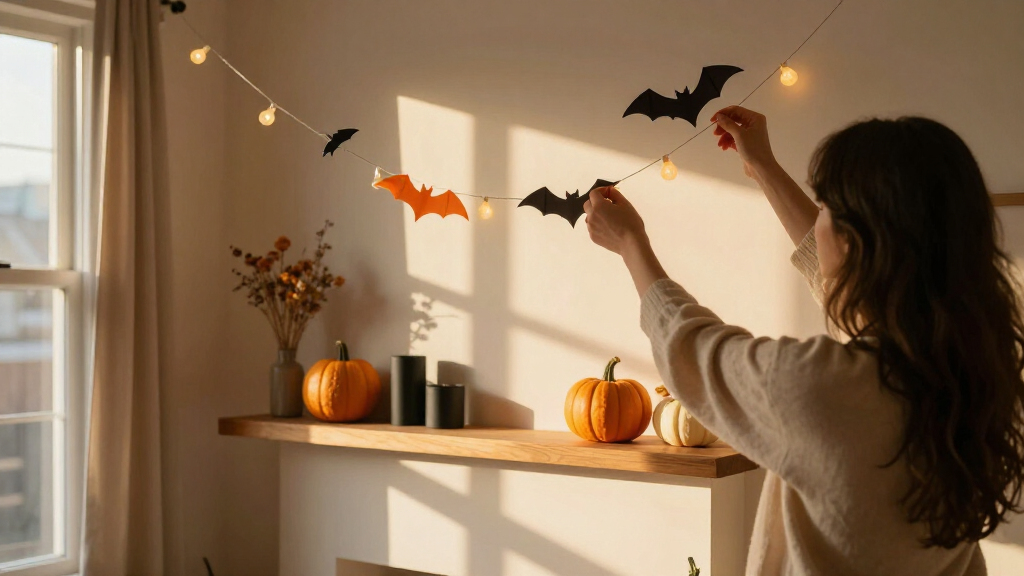
Install hanging items next so you can arrange furniture around them afterward. Blow up 10-15 black and orange balloons; attach a few to the ceiling with tape and let 3-4 float with ribbons curling down. Hang paper bats, ghosts, or spider cutouts on walls in clusters of 3-5 at slightly different heights rather than in even rows — clustering looks natural, rows look like an office. Stretch cotton cobwebs across upper corners and tug the edges thin so they resemble real webs. Tuck a few plastic spiders into the webs as finishing touches.
Tip: Test tape on an inconspicuous wall spot first and remove it slowly after the party. Painter’s tape is safest on paint; packing tape is stronger but can pull paint off drywall.
Check: Wall and ceiling decorations are concentrated at eye level and above, corners have visible webs, and nothing hangs low enough to hit a guest’s head.
Step 4: Build the themed food and drink table
Cover the table with a black or themed tablecloth, then build height with boxes or crates underneath the cloth before placing food. Add themed labels to dishes (write names like ‘Mummy Dogs’ or ‘Witch’s Brew’ on card stock folded into tents). Decorate with items that won’t touch food: mini pumpkins and gourds, skull props, or a small branch spray-painted black in a vase. Set one showpiece in the center, such as a punch bowl with frozen hand-shaped ice or dry ice fog (use dry ice only with thick gloves, never let it touch skin or be ingested, and keep the room ventilated).
Tip: Leave at least one-third of the table surface empty when decorating. You need serving space, and crowded tables get knocked over.
Check: The table reads as themed at a glance, food labels are legible in party lighting, and there is clear space for platters and guest plates.
Step 5: Create a photo backdrop
Choose one wall or corner as the photo spot and concentrate your strongest decorations there. Hang a seamless backdrop — a plastic tablecloth, black fabric, or themed backdrop sheet — flat against the wall, secured at all four corners. Layer the theme on top: a wreath, balloon arch, cutout characters, or a string of lights framing the edges. Place a prop bucket nearby with 4-6 items such as hats, masks, and signs. Mark the floor with tape 4-6 feet from the wall so guests know where to stand.
Tip: Position lighting to fall on the backdrop, not behind it. Test by taking one photo with your phone before guests arrive and adjust from what you see.
Check: A phone photo taken from the tape mark shows a filled, themed background with the subject evenly lit and no gaps showing the plain wall.
Step 6: Decorate the bathroom and finishing touches
Give the bathroom a quick themed pass since every guest will see it: a themed hand towel, a small sign on the mirror (‘Wash Your Hands, Mortals’ or similar), and one prop on the counter. Back in the main room, add final touches: scatter fake spiders or rats on shelves and windowsills, add a doormat, and set a themed playlist at low volume. Walk the entire space once as if you were a guest arriving, entering through the front door, and fix anything that looks bare, crooked, or hazardous.
Check: Every zone has at least a touch of theme, no everyday clutter remains visible, and the full guest walk-through flows without dead spots or obstacles.
Step 7: Do a safety and lighting final check at party time
One hour before guests arrive, walk the space again with party lighting on. Check that all cords are taped down or run along walls, nothing flammable sits near candles or heat, exit paths are clear, and decorations aren’t blocking smoke detectors. Turn on all the ambient lighting exactly as it will run during the party and confirm the entryway is lit. Take reference photos so you can reset the space after any pre-party moving of furniture.
Tip: Set out a small repair kit — tape, scissors, spare batteries, and a few spare decorations — in a drawer so you can fix anything mid-party in seconds.
Check: You can walk the full guest path in party lighting without tripping, and you know where the repair kit is.
Common Mistakes to Avoid
- Decorating evenly across every surface, which makes the space feel flat and cluttered rather than themed. — Concentrate 60% of your effort and budget on the entryway and photo backdrop. Give secondary zones like the bathroom one or two touches only.
- Using strong tape or nails on walls that can’t take them, causing damage in a rental or losing a deposit. — Test tape in a hidden spot first, use painter’s tape or command hooks on painted walls, and check your rental or venue rules before hanging anything.
- Making the room too dark. Hosts dim everything for atmosphere, then guests can’t find the food, drinks, or bathroom. — Keep functional areas (food table, drink station, bathroom path, stairs) genuinely lit, and reserve dim or colored lighting for decorative zones.
- Waiting until party day to buy decorations and inflating balloons, leaving no time to fix gaps or failures. — Shop and test everything the day before. Set a hard cutoff: all decorating finishes at least two hours before guests arrive.
Troubleshooting
Problem: Decorations keep falling off walls or the ceiling during the party.
Solution: Clean the surface with rubbing alcohol before applying tape or hooks — dust is usually the culprit. For heavier items, switch to command hooks rated for the weight, and hang light items from fishing line attached at the ceiling instead of the wall.
Problem: Cobwebs look like clumps of cotton instead of webs.
Solution: Stretch the cobweb much thinner than seems necessary — pull from opposite corners until you can almost see through it. Anchor it at two fixed points (like a corner and a light fixture) rather than draping it loosely.
Problem: The photo backdrop photographs with glare or dark shadows.
Solution: Move your light source to shine on the backdrop from the front at a 45-degree angle, and keep lights out of the camera’s frame. If windows behind the backdrop cause glare, hang the backdrop on a different wall or shoot after dark.
Problem: String lights go out or the room overloads a circuit.
Solution: Plug lights into a power strip with a surge protector and count the load — keep LED strings on one circuit and anything with heating elements on another. Always pack spare fuses (in the light package) and spare bulbs before the party.
What Success Looks Like
Your decorations are done when all of these are true:
- A guest arriving at the door immediately sees the theme before entering.
- The main room glows with layered, colored ambient light and no unsafe dark walking paths.
- The food table is themed, labeled, and has open serving space.
- The photo backdrop produces a clean, filled photo taken from the marked floor spot.
- Every zone, including the bathroom, has at least one themed touch, and no everyday clutter is visible.
- You’ve walked the full guest path in party lighting and removed all tripping, fire, and exit-blockage hazards.
Next Steps
After the party, take down decorations within 24-48 hours while you remember what goes where. Remove tape slowly and at a low angle to protect paint. Sort decorations into a labeled storage bin by zone (entryway, lights, backdrop, table) so next year’s setup takes half the time. Photograph your finished setup before guests arrive and after cleanup so you can repeat what worked and skip what didn’t. For future parties, add to your collection gradually — one strong new element per year, like a fog machine or an improved backdrop, keeps the display fresh without repeating a full shop every season.
Frequently Asked Questions
How far in advance should I decorate for a Halloween party?
Decorate the day before or the morning of the party. Earlier is fine for durable decorations, but balloons deflate after 2-3 days, cobwebs collect real dust, and fresh elements like pumpkins can soften. Keep at least a two-hour buffer between finishing and guest arrival.
What’s a realistic budget for decorating a home party space?
Plan on $50-$150 for a typical living room, entryway, and food table. Lights and tablecloths deliver the most impact per dollar. Dollar stores cover cutouts, plastic spiders, and cobwebs; spend real money only on the photo backdrop and lighting, since guests interact with those most.
How do I decorate a rental or apartment without damaging walls?
Use painter’s tape, command hooks, and tension rods exclusively. Hang backdrops from command hooks with fishing line, weight freestanding props instead of anchoring them to walls, and photograph every wall before the event so you can dispute any damage claims afterward.
Is dry ice safe for a Halloween punch bowl?
Only with precautions: wear thick gloves or use tongs, never let dry ice touch bare skin, never add it to drinks guests will ingest (use a separate fogging bowl or a sealed container inside the punch), keep the room ventilated, and store it in a cooler, never a sealed container or freezer.
How do I make decorations work for both kids and adults at the same party?
Keep gore and jump-scare props out of shared spaces and concentrate them in one optional ‘haunted corner’ adults can visit. Use spooky-cute themes (friendly ghosts, pumpkins, purple lighting) in the main room, and let the food table and photo backdrop carry humor rather than horror.
NFL season / tailgating Picks
team gear
As an affiliate, we earn on qualifying purchases.