
TL;DR
Moving your rig into a closet can drastically reduce noise, but it needs proper ventilation and treatment. Absorbing reflections inside helps, while sealing gaps and decoupling vibrations block sound transmission. The right setup makes a tiny space work as a quiet, functional studio.
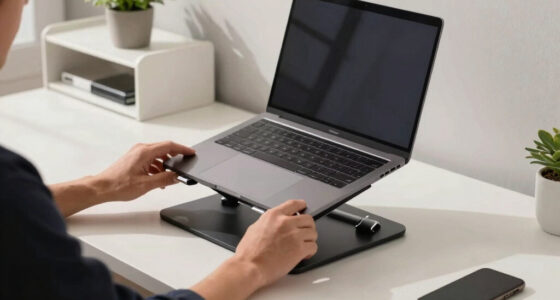
Ever tried recording vocals in a closet? The rich, muffled sound might be a clue, but what’s really happening is you’re trapping reflections and echoes in a tiny space. Moving your rig into a closet isn’t just about hiding noise; it’s about smart placement and treatment that make your recordings clearer and your workspace quieter. But don’t think foam alone will do the trick. You’ll need a mix of strategic placement, sealing gaps, and proper ventilation to turn that cramped closet into a true sound zone. Learn more about acoustic dampening and setup.
In this guide, I’ll show you how to master acoustic dampening, where to place your panels and gear, and how to set up a closet rig that’s quiet, cool, and effective. Whether you’re doing voice-over, vocals, or running a noisy AI workstation, the right setup can make all the difference. Discover high-end gear and luxury setups.
Acoustic dampening
& the rig in the closet.
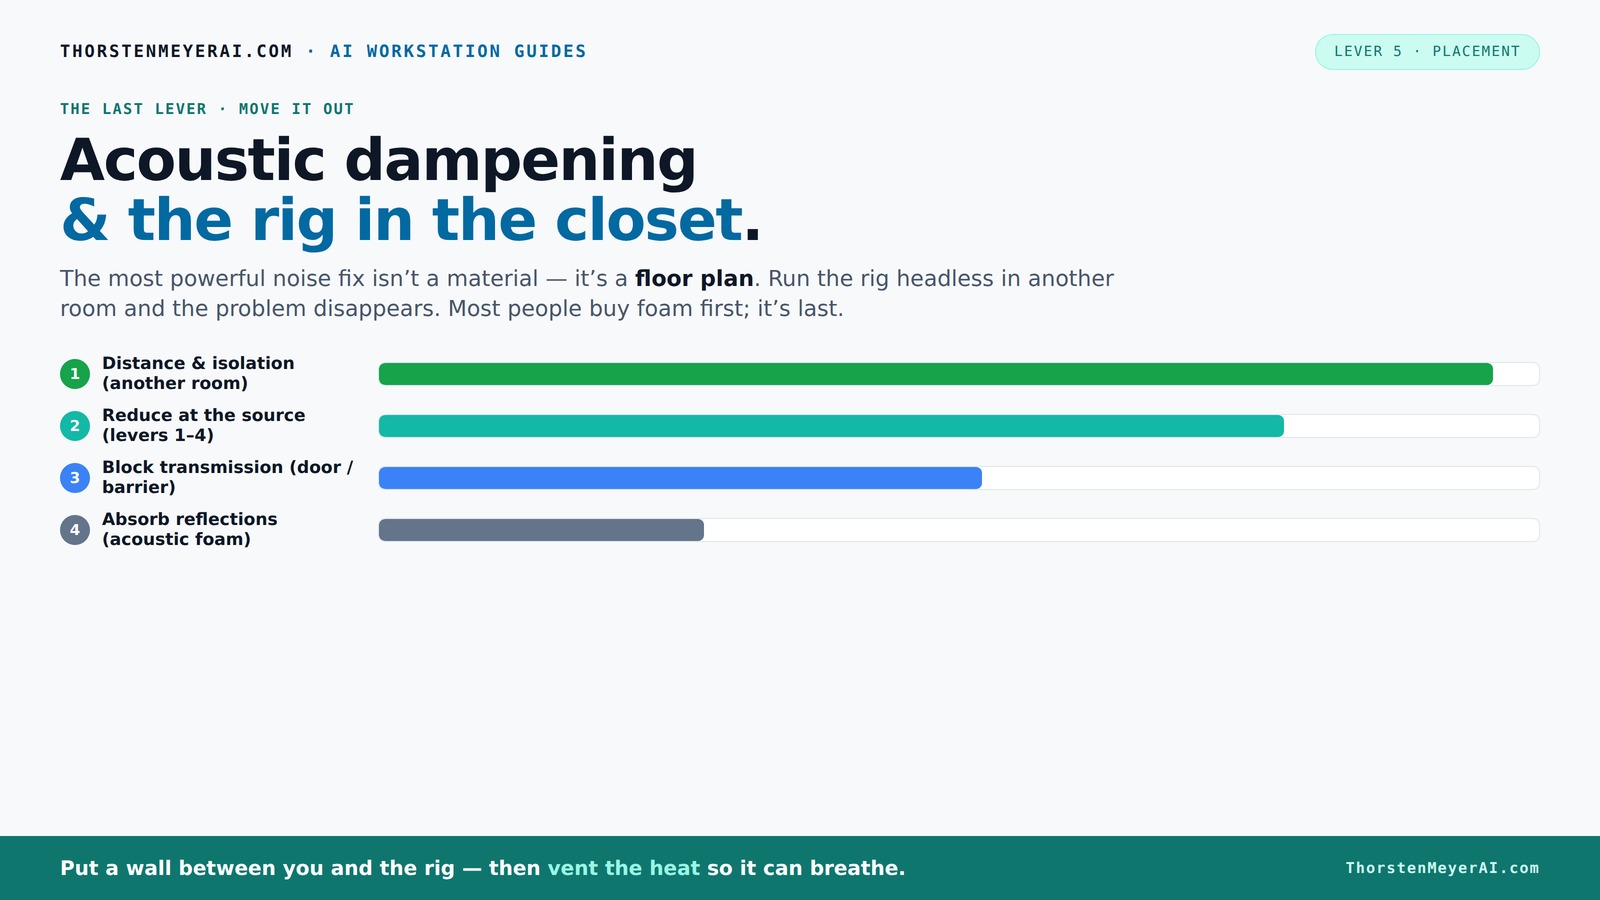
The most powerful noise fix isn’t a material — it’s a floor plan. A rig you can’t hear because it’s in another room beats any amount of foam. Tap the approaches in Part 1 to see what actually works.
(another room)
(levers 1–4)
(door / barrier)
(acoustic foam)
Contain the noise, not the heat
Key Takeaways
- Sealing gaps and decoupling vibrations are the most effective ways to block sound transmission in a closet setup.
- Placement of acoustic panels at reflection points dramatically reduces echoes and improves clarity.
- Ventilation is critical — a sealed closet with no airflow overheats quickly, risking damage to equipment.
- Layering treatments, combining sealing, absorption, and mass, yields the best soundproofing and acoustic results.
- Budget-friendly options like blankets and rugs can make a noticeable difference, but don’t neglect proper sealing and placement.

Focusound 52 Pack Acoustic Foam Panels 1" x 12" x 12" Sound Proof Foam Panles Soundproofing Noise Cancelling Wedge Panels for Home Office Recoding Studio with 300PCS Double-Side Adhesive
- Soundproofing Design: Triangular grooves for noise absorption
- Includes Adhesive Tape: 300pcs double-sided adhesive for easy installation
- Easy Shape Recovery: Soak in water to restore shape within 48 hours
As an affiliate, we earn on qualifying purchases.
As an affiliate, we earn on qualifying purchases.
Why Acoustic Treatment Inside a Closet Isn’t Just About Foam
Acoustic treatment inside your closet mainly reduces echoes and unwanted reflections. Foam panels, blankets, and rugs absorb sound waves bouncing around, making your recordings less boomy and harsh. But they don’t block sound from escaping or entering — that’s a different game called soundproofing.
For example, a foam panel on the wall behind your mic will cut down on slap echoes. But if your door is cracked open or the closet isn’t sealed, sound leaks out. Conversely, thick drywall, sealing gaps, and decoupling vibrations stop noise from escaping, which foam alone can’t do.
Think of acoustic treatment as softening the room, while soundproofing is about blocking the noise from getting in or out. Both are essential but serve different purposes.
Placement Strategies That Make Your Closet Voice Recordings Shine
Where you place your mic and treatment matters more than you think. The goal: minimize reflections and standing waves. Start by treating the wall behind your mic — this is where sound bounces directly into the capsule.
Next, address side reflections by adding panels at 45-degree angles around your mic. If your closet is tiny, also consider the ceiling, since sound can bounce down from above.
Here’s an example: place a reflection filter directly behind your microphone, with acoustic panels on the side walls and a bass trap in the corner if boomy low end persists. This setup turns a cramped closet into a clean-sounding booth.
The ‘Rig in the Closet’ Setup: Ventilation, Heat, and How to Keep It Cool
Putting a powerful PC or GPU in a closet sounds perfect for noise reduction, but heat is the enemy. Sealed spaces trap hot air, causing temps to skyrocket. A 600W GPU can turn a closet into an oven in minutes if not properly ventilated.
To fix this, add a passive vent or, better yet, an exhaust fan that pulls hot air out. A small duct with a quiet fan can keep your rig cool while still muffling the noise.
Some DIYers use soundproof cabinets with built-in airflow or place fans outside the closet, ducting cool air in. Remember: a silent rig that overheats isn’t useful. Check out this guide on cooling strategies for AI workstations for detailed cooling strategies.
How to Seal Gaps and Block Sound Leaks in a Closet
The biggest sound leaks come from gaps around doors, outlets, and vents. Sealing these is like shutting the doors on noise. Use weatherstripping, door sweeps, and caulk to seal cracks and gaps. Learn about sealing gaps for better soundproofing.
For example, sealing the door frame with weatherstrip and adding a draft stopper can cut noise escape by 50%. Cover outlets with acoustic gaskets or put a blanket over gaps to prevent sound leaks.
Remember, even tiny cracks let sound slip through. A well-sealed closet can block up to 80% of outside noise, making your recordings much cleaner.
Layering Acoustic Treatments and Why It Works Better
Single foam panels won’t turn your closet into a soundproof vault. Layering is key. Start with sealing gaps, then add absorption panels at reflection points, and finally consider adding mass with extra drywall or damping mats. Explore premium closet organizing and acoustic solutions.
For instance, hang moving blankets over the door, install foam panels at reflection points, and put a bass trap in the corner. This layered approach transforms a tiny, echo-prone closet into a controlled environment.
According to experts, combining treatments can reduce reflections by over 90% and improve low-frequency control significantly.
The Cost-Effective DIY Tricks to Improve Your Closet Studio
Not everyone has a big budget. Good news: you can make a huge difference with everyday items. Use thick blankets, rugs, and pillows to dampen sound. Move your mic closer to a reflective surface to reduce reverb.
Place a rug on the floor to reduce reflections, hang blankets on the walls, and use a reflection filter behind your mic. These simple steps can cut echo and background noise significantly without spending a fortune.
For example, stacking blankets around your mic creates a makeshift booth that’s surprisingly effective for voice recordings.
Common Mistakes That Ruin Your Closet’s Sound Quality and How to Fix Them
Many DIY closet studios fail because of poor placement or neglecting sealing gaps. For example, placing the mic in the corner creates bass buildup and echoes. Or leaving gaps around the door allows sound to escape. Find textile and acoustic treatment tips.
Fix these by placing the mic at reflection points, sealing cracks, and avoiding parallel surfaces that cause flutter echo. Also, don’t forget to treat the ceiling if it’s low and reflective.
These small adjustments make a big difference in clarity and noise control.
Frequently Asked Questions
Does acoustic foam actually soundproof a closet?
No, acoustic foam mainly reduces echoes and reflections inside a space. It doesn’t block sound from leaving or entering. For true soundproofing, sealing gaps and adding mass are necessary.Where should I put acoustic panels in a closet booth?
Place panels at reflection points — behind the mic, on side walls at 45 degrees, and on the ceiling if reflections bounce down. This setup minimizes echo and improves clarity.How much treatment do I need for vocals or voice-over?
Start with sealing gaps, then add panels at reflection points, and include a bass trap if needed. Layering these treatments is more effective than relying on foam alone.Do I need bass traps in a small closet?
Yes, especially if low-end buildup causes boomy recordings. Bass traps absorb low frequencies that thin foam panels can’t handle, improving overall sound balance.What’s the best way to keep a closet cool while running a powerful rig?
Add a vent or exhaust fan to circulate air. Use ducting or a soundproof cabinet with built-in airflow. Regularly monitor temperature to prevent overheating and noise escalation.Conclusion
Transforming a closet into a quiet, effective studio isn’t about magic — it’s about smart placement, sealing gaps, and layering treatments. Think of it like tuning a tiny instrument: every detail matters. When you combine proper airflow, strategic positioning, and affordable DIY fixes, that cramped space turns into a surprisingly capable recording booth.
Next time you hear echo or noise in your closet, remember: a little effort in sealing and placement can make your recordings clearer and your workspace quieter. Your perfect tiny studio is just a few tweaks away.